Advanced Firmware Update Process
If for any reason the CM4 fulatower gets stuck in a blue/white light without going through the whole boot process, or it is not connected to the Wi-Fi or propagating the FxBlox hotspot, you need to perform a full re-image.
Video Guide for Re-Imaging
Written Steps for Re-Imaging
Unplug the Tower from Power
Ensure the tower is not connected to any power source before proceeding.
Opening the Tower
Follow the instructions in the video linked above to open the tower safely.
Connect the USB-C Port
Connect the USB-C port on the side of the tower to your laptop or PC.
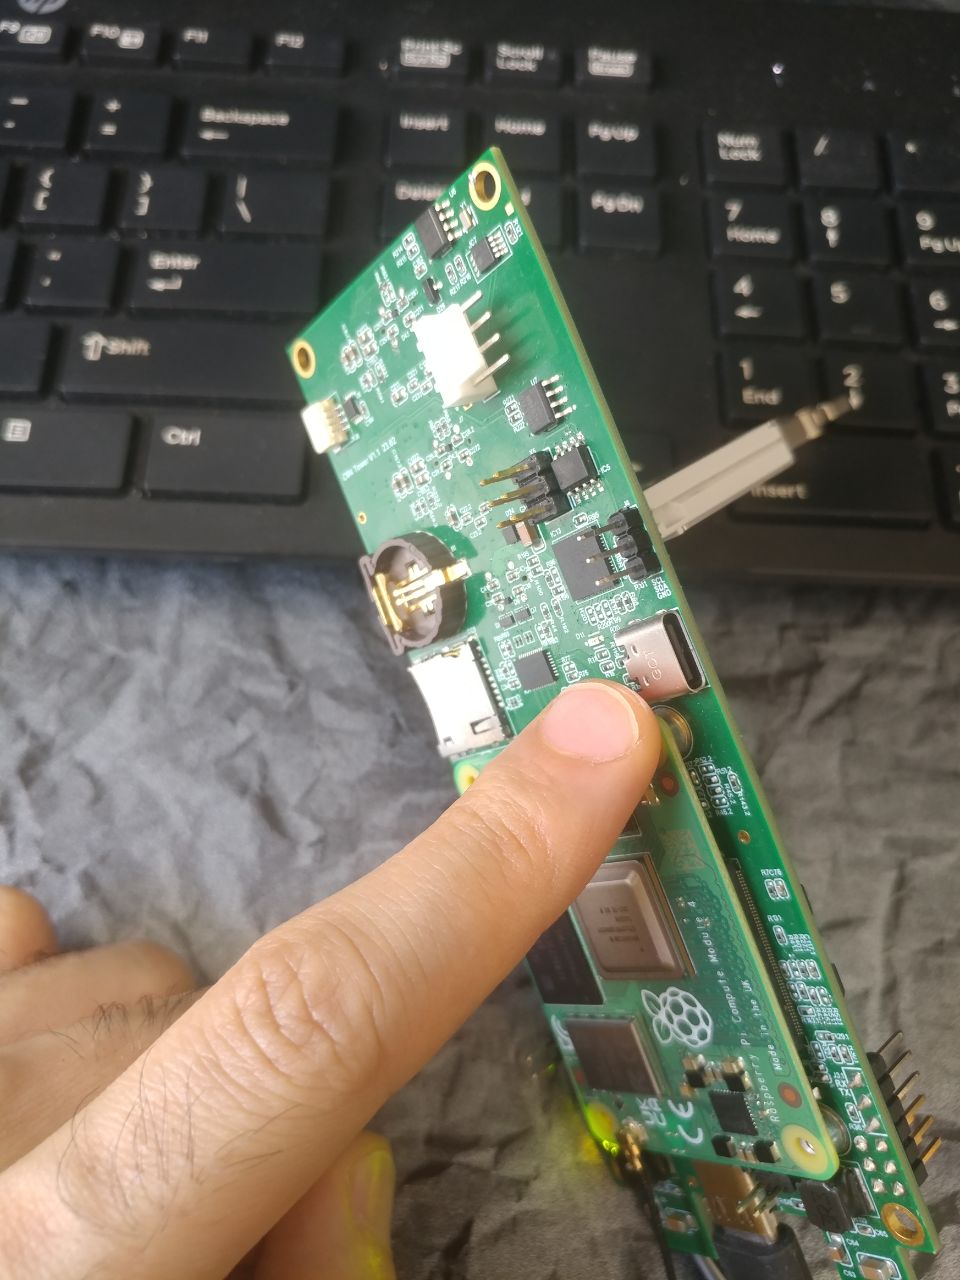
Short Circuit the Two Pins
Short circuit the two pins located on the bottom left side of the Raspberry Pi module. You can use anything to short circuit them, like putting the head of a USC-C cable between them. But make sure the material you are using is conductive and not Aluminum for example (key rings for example are usually aluminum)
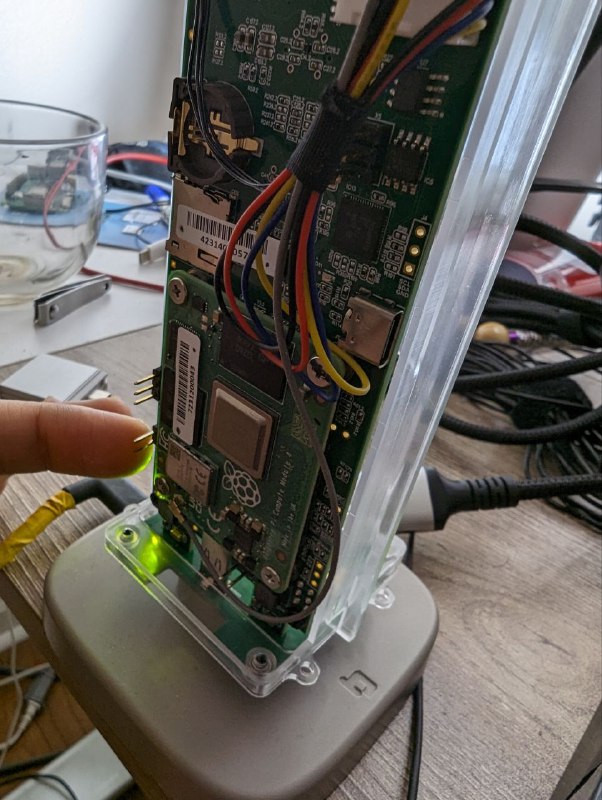
Power On the Tower
Plug the tower back into power. It should display a blue/white light and remain like that, indicating it is in image mode. You can remove the short circuit from step 4 at this stage.
Installing and Running rpiboot
For Windows:
- Download and install rpiboot from here.
- Type
rpibootin your search bar and run it. After a few seconds it starts printing some stuff and automatically closes after 15 seconds or so. Wait for the terminal to close before proceeding.
For Mac:
git clone --recurse-submodules --shallow-submodules --depth=1 https://github.com/raspberrypi/usbboot
cd usbboot
brew install libusb
brew install pkg-config
make
sudo ./rpibootAfter a few seconds it starts printing some stuff and automatically closes after 15 seconds or so. Wait for the terminal to close before proceeding.
Download the Latest Image
Download the latest image for your CM4, from the official GitHub repository. Download all the files that start with
rpi_cm4_fulimageinto one folder on your computer.Unzip the Image Content
Right click on downloaded zip and use 7zip application to extract. Extract the contents of the downloaded image to a known location on your computer.
Install and Run Raspberry Pi Imager
Configure Raspberry Pi Imager
Open Raspberry Pi Imager and select the following:
- Raspberry Pi Device: RASPBERRY PI 4
- Operating System: Scroll down and choose "custom image," then select the
.imgfile inside the folder you unzipped in the previous step. - Storage: Click on "Choose storage" and select the newly added storage, which should be around 30GB and named RPi-Msd.
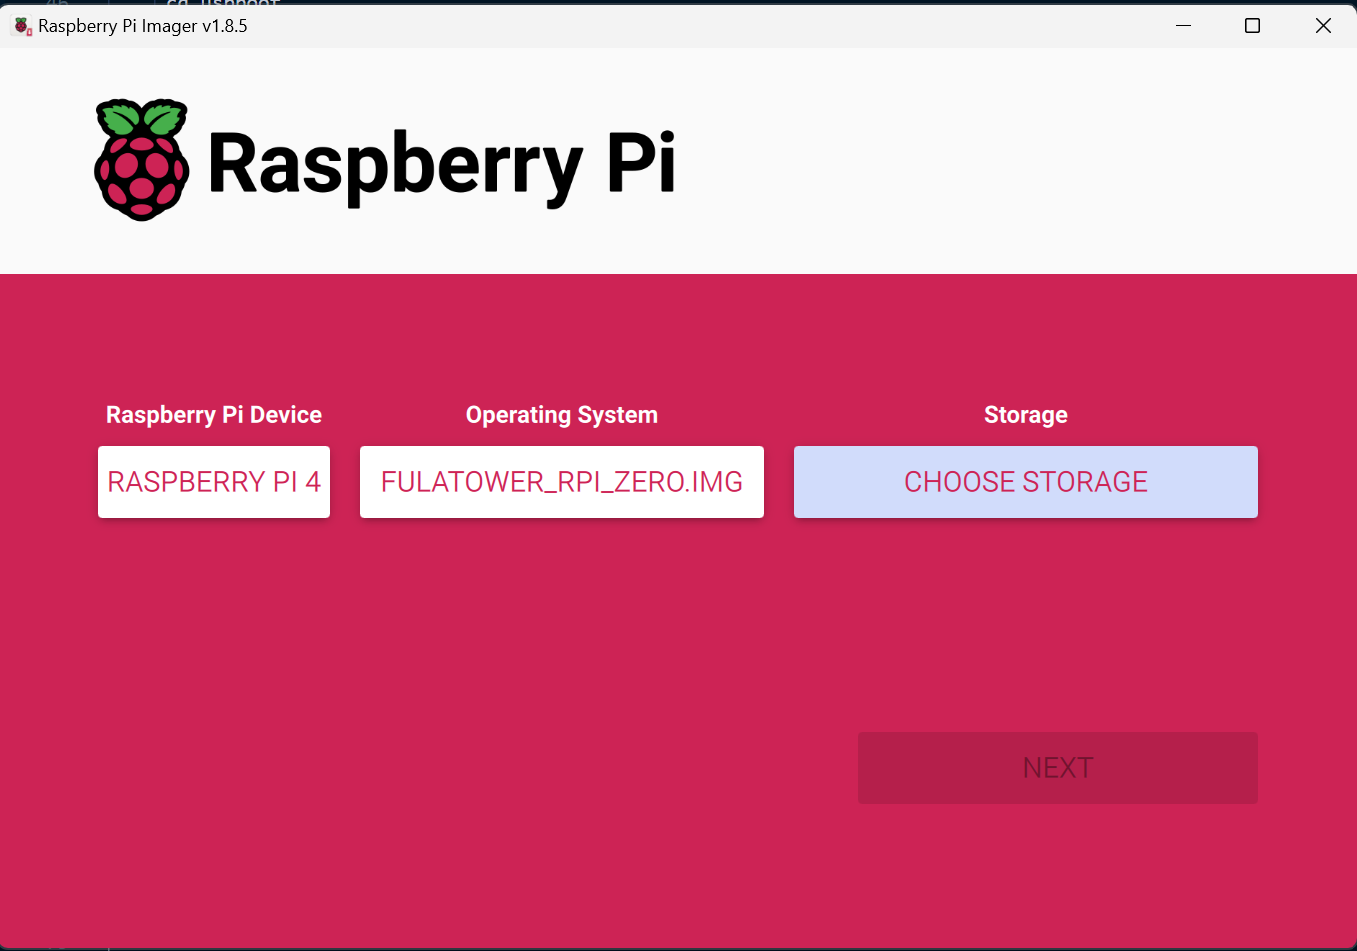
Start the Imaging Process
Click "Next." Choose "No" for the first popup asking if you want custom configs, and "Yes" for the second one asking for confirmation.
Wait for Completion
The imaging process might take about 3 hours. Please be patient.
Final Steps
After completion, remove the short circuit from the pins, disconnect the USB-C cable connecting the tower to the computer, and then unplug and re-plug the tower to power.
Set Up Using FxBlox App
Now that you have the updated fulatower, use the FxBlox app to set it up. There's no need for any other manual updates.
Closing the Tower
Once you've confirmed a successful setup through the FxBlox app, close up the tower again to protect it from damage.
- If at the end of setup, you see a message that the app could not connect to Blox, Close the app, unplug and re-plug the blox and wait for 1 minute and open the app.