Advanced Firmware Update Process
This process is only available Windows
If for any reason the RK1 fulatower gets stuck in a blue/white light without going through the whole boot process, or it is not connected to the Wi-Fi or propagating the FxBlox hotspot, you need to perform a full re-image.
Written Guide for Re-Imaging
Unplug the tower from power
Ensure the tower is not connected to any power source before proceeding.
Opening the tower
Follow the instructions here to remove the single board computer (SBC) from the case.
Download Blox drivers
You can download the drivers from our github.
Now, find it in your Downloads, right-click it, and extract all.
Install Drivers
After its been extracted, run the executable to install.
Download RKDevTool app
Various antivirus might flag the rk1 flash tool as malware, but its safe to download. You can get the program from our github.
Unzip and install RKDevTool
We recommend using winrar to unzip the RKDevTool. Regular Windows extract will not work.
After you've extracted it, you can install the program with all of its default settings.
Download and unzip latest full image
Find
minimal_fullimage_minimal.zipin the latest release under the Assets section on GitHub.Now, find it in your Downloads, right-click it, and extract all. You will need this in step 11.
Download the rk3588 spl loader
Finally, download the spl loader from our github as well. You will need this in step 11.
Short pins to enter BOOT mode
To get the RK1 into BOOT mode, you need to "short the pins". Specifically you need to short the pins labeled BOOT. This means to create a connection between one pin and the another. This can be done with anything conductive. Or if you have male-male jumper cable that would the best way to short the pins.
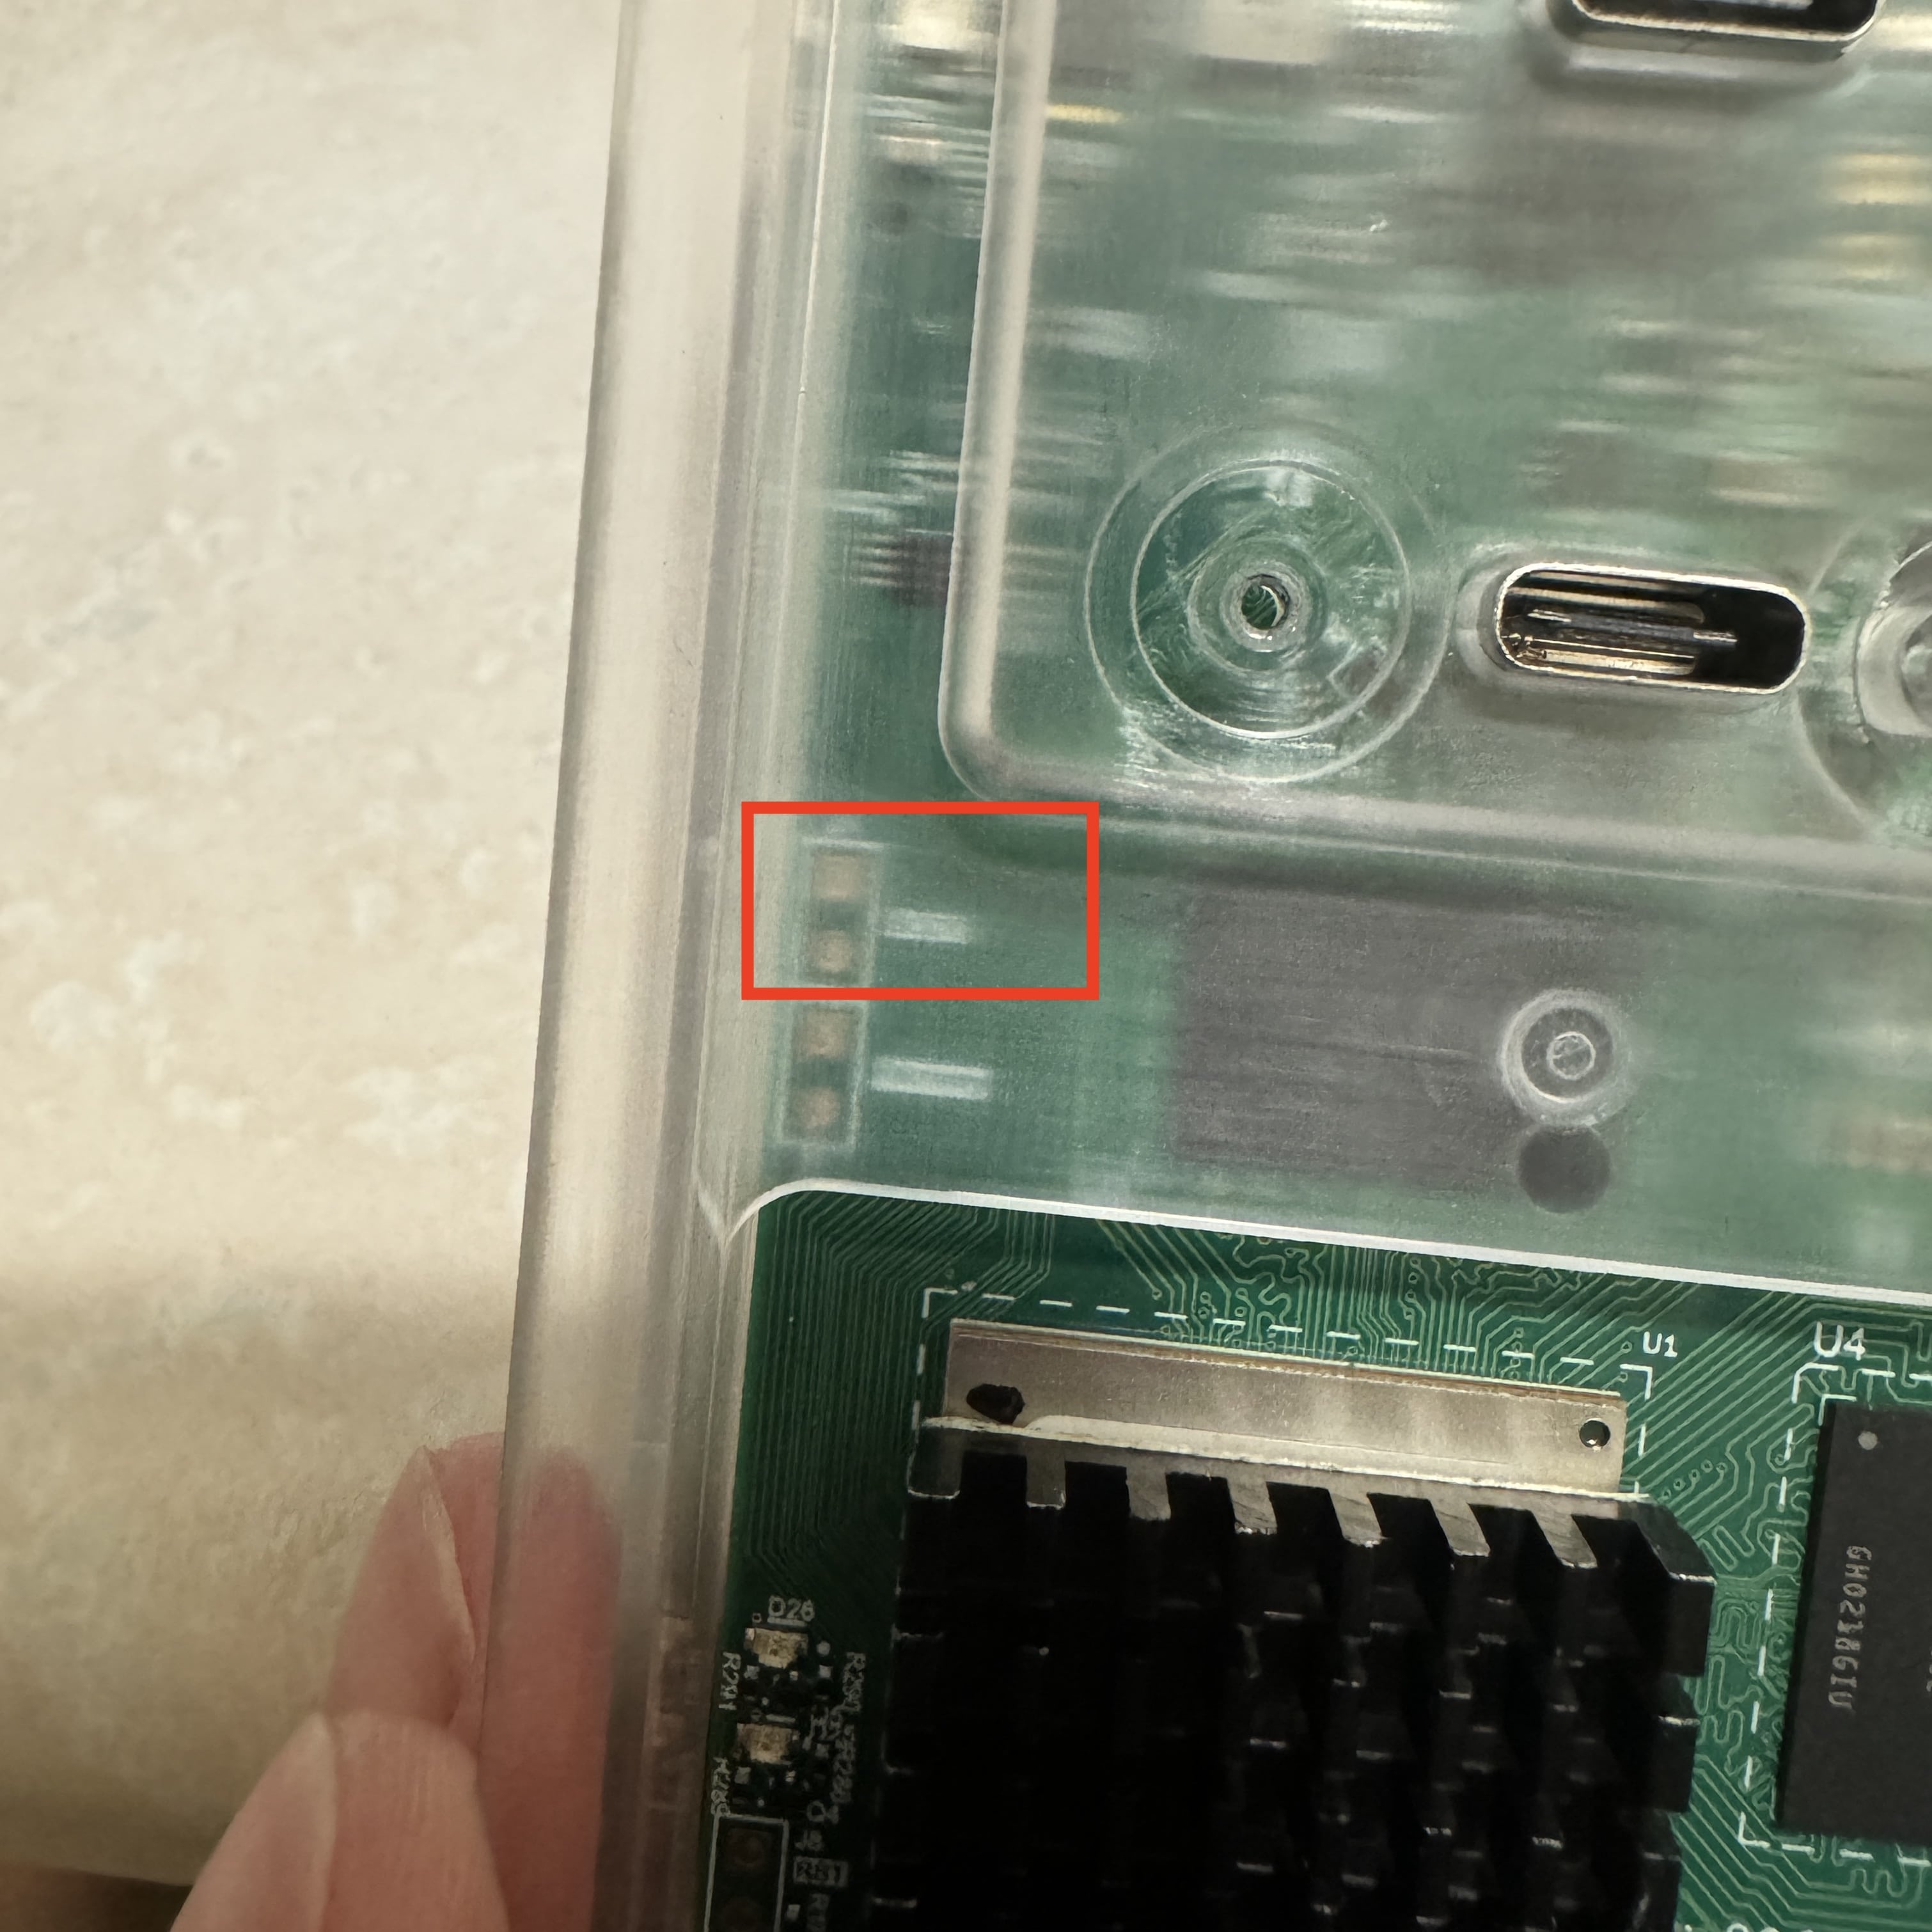
The red box shows where the pins marked BOOT are located.
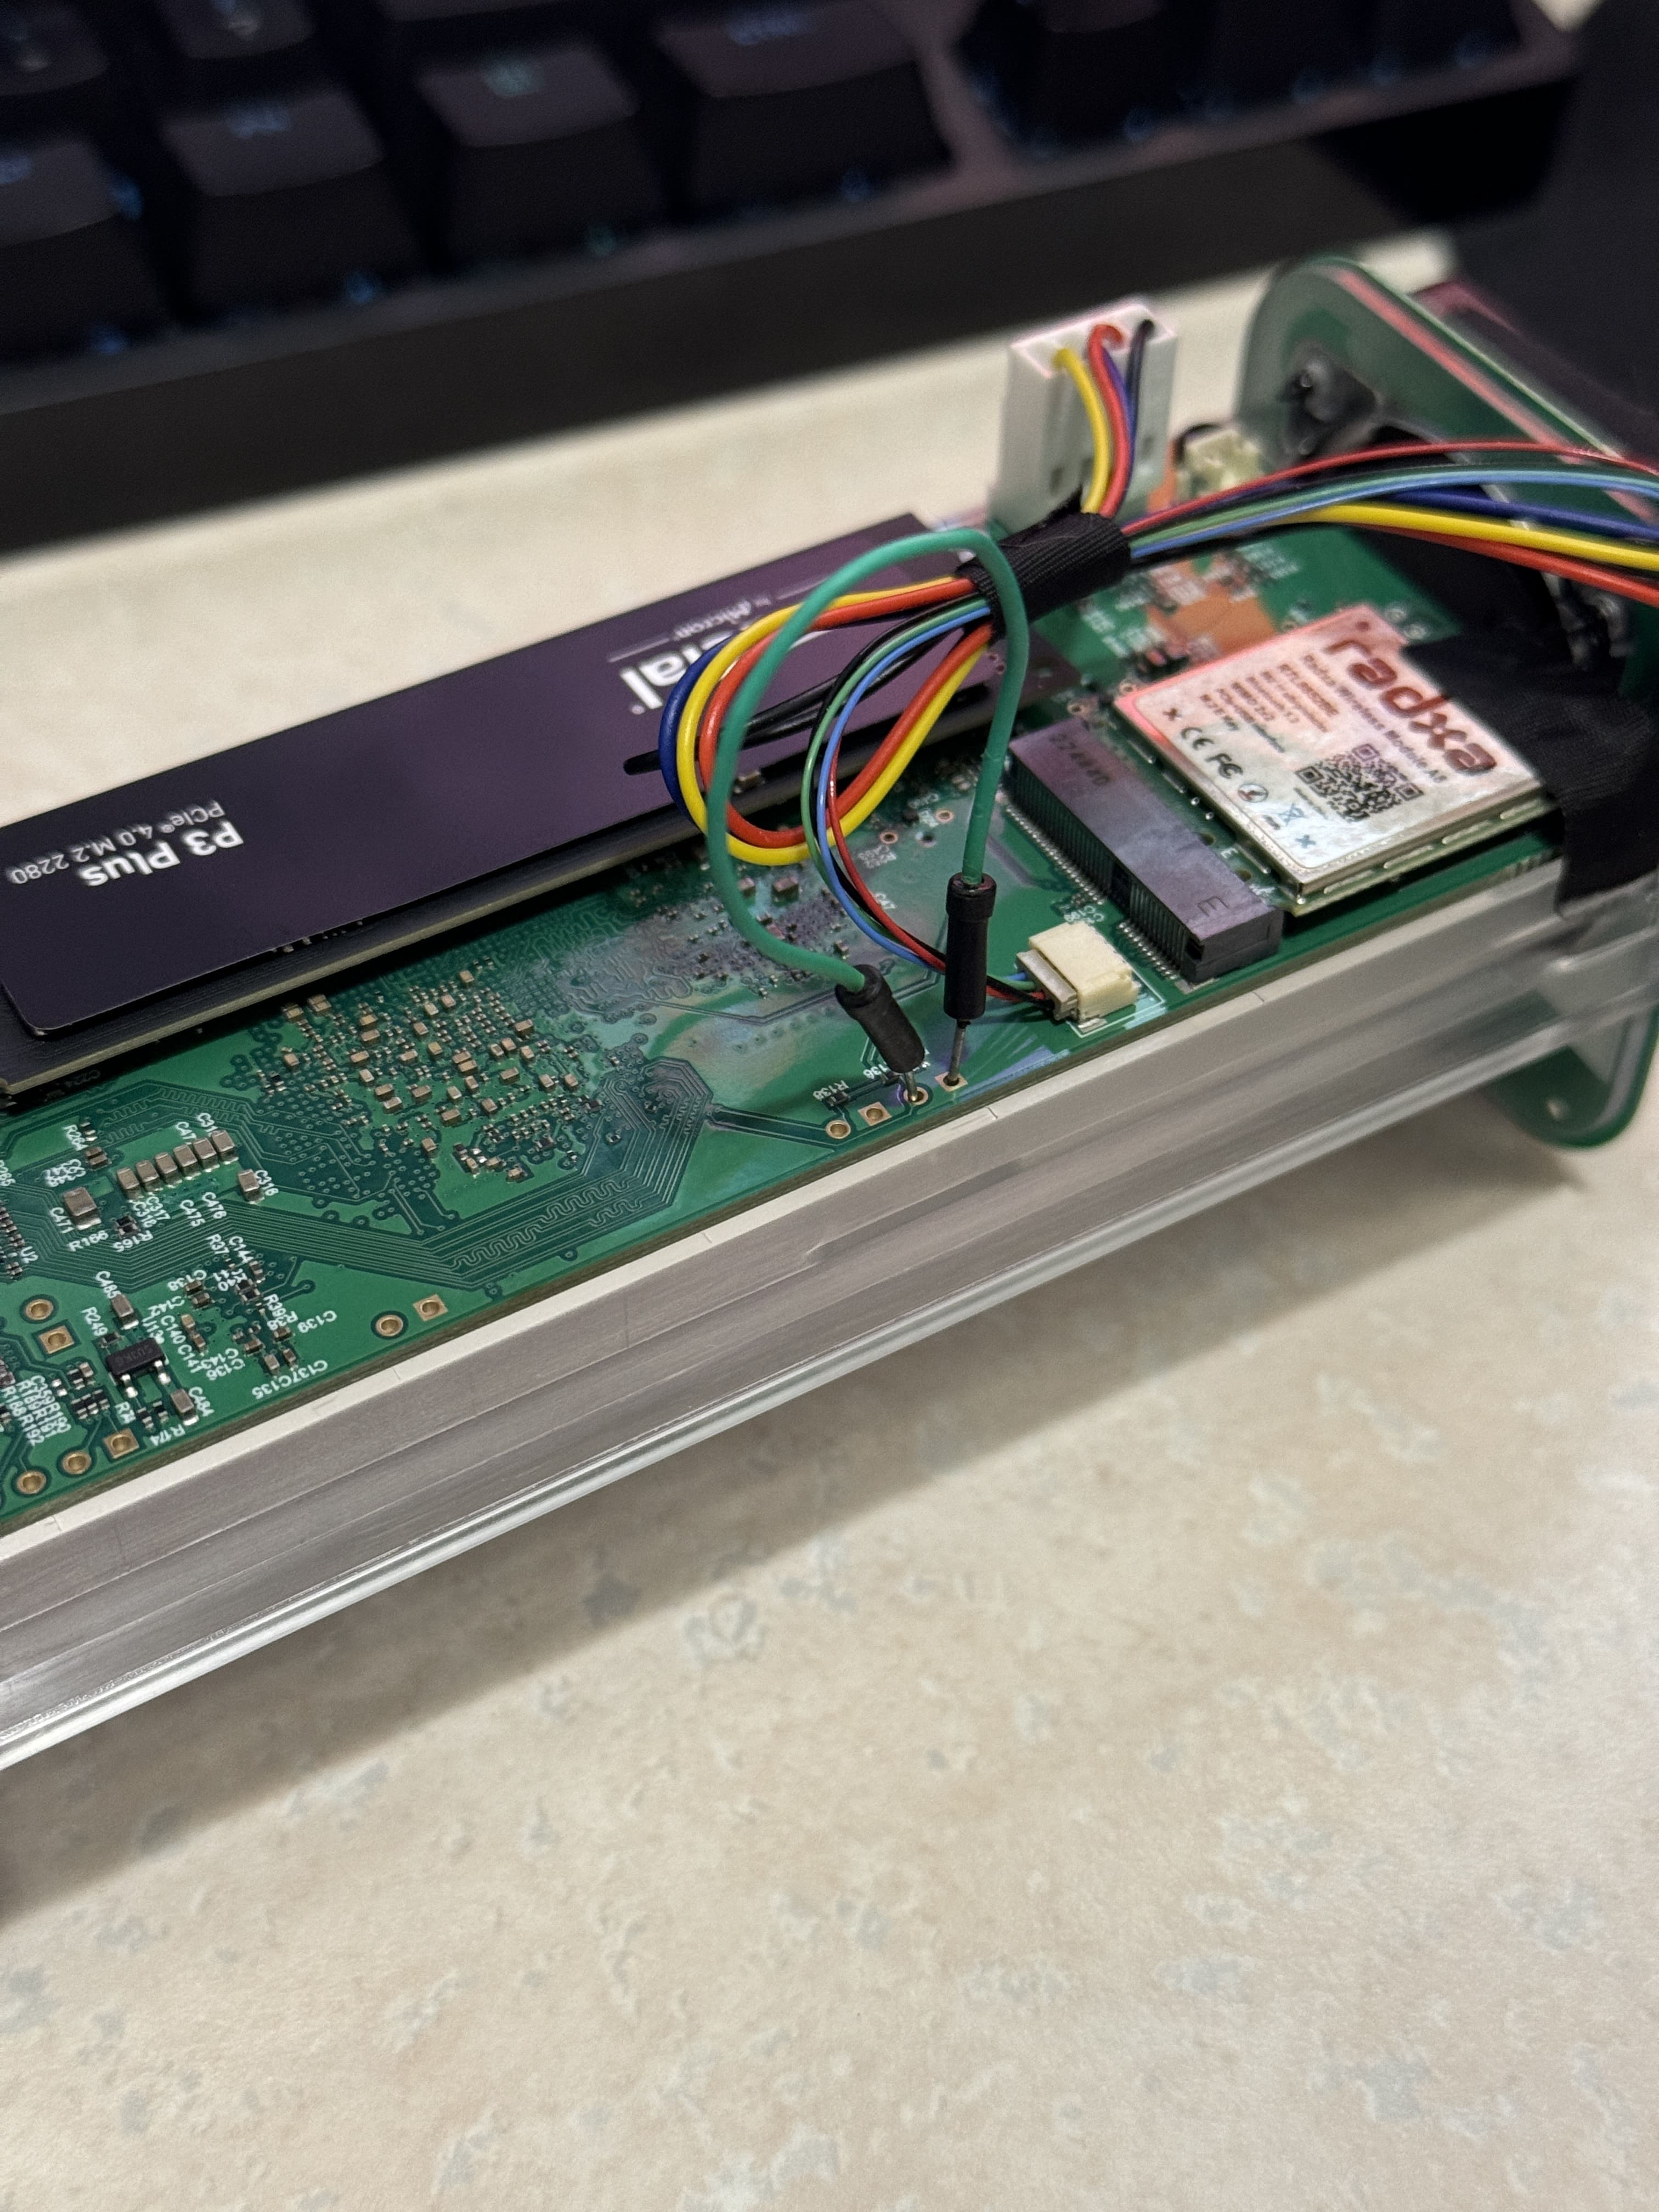
So to not take apart the whole board, the jumper cable can be inserted through the bottom of the board.
Connect Blox to computer
Connect a usb-c cable to the middle port and the other end to your computer. ONLY the middle port is used for loading the firmware onto the Blox.
Power on Blox and run RKDevTool
With the Blox connected to your computer and the installer ready. Connect a power cable to the blox, and now you should hear your windows device recognize the blox.
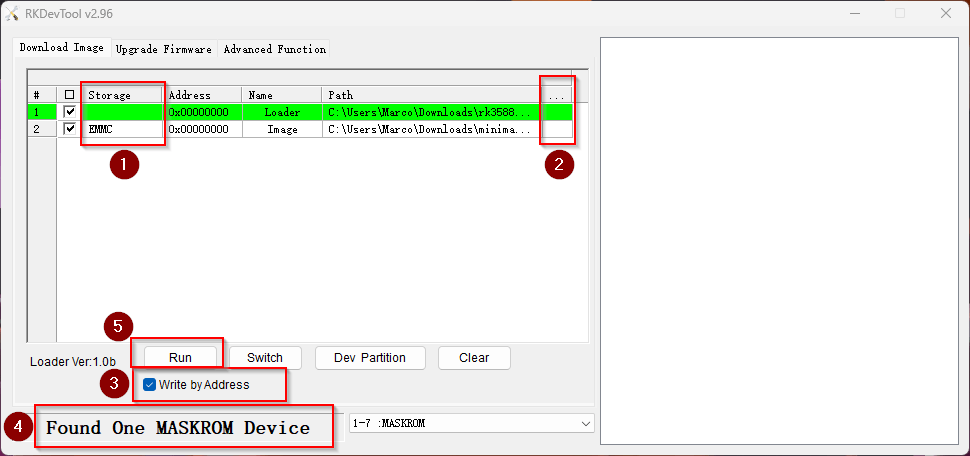
How To Run RKDevTool
- Verify the Name col, is set to blank and EMMC.
- Click on the elipse's cell in row 1 to select the spl loader. Now, click on the second row's elipse cell to choose the full image.
- Check the Write by Address box.
- Verify it says Found One MASKROM Device at the bottom of the page.
- Click Run and wait about 10 minutes for it to complete.
Finishing steps
After you get a message saying the downloading is complete. You can unplug the jumper cable, pc cable, and now unplug and replug in the power. Now wait 10-20 minutes to get a flashing cyan lights. Be patient on the first boot, post-update! The FxBlox automatically reboots a couple times and will go through a series of lights. This full process should take about 20 minutes to fully process the update and show the FxBlox WiFi.
Put Blox back together
After you've verified that the Blox can get to the flashing cyan light state, you can unplug the Blox, put it back together, and plug it back in.